How to Double Your Conversion Rate with a Single Rewards Image
The Fastest Way to Boost Conversion Rates Without Ads
If you want to boost your wadiz funding results, there’s something you should check first before immediately increasing your ad budget or devising a new marketing strategy.
That is the main Rewards image.
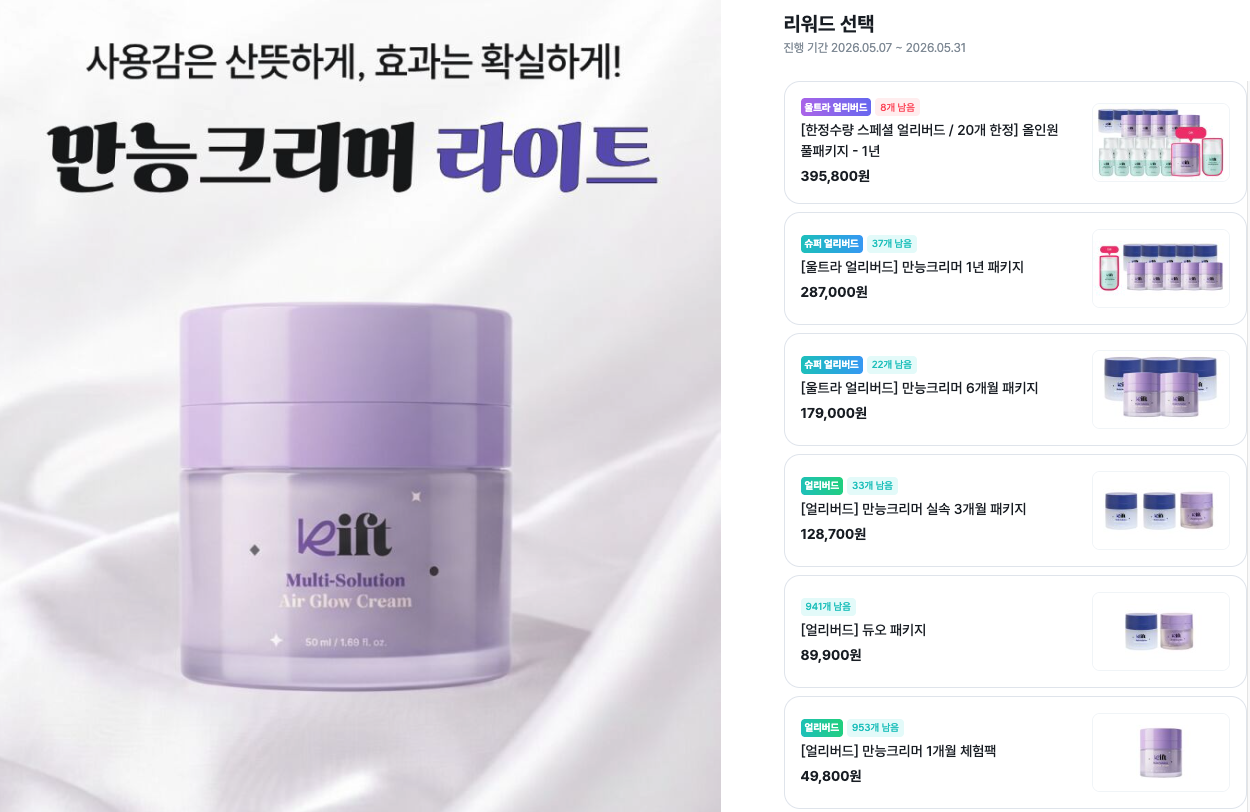
An analysis of wadiz project data from May 2026revealed thatprojects that uploaded a main Rewards imagehad a funding conversion rate1.8 times higherthan those that did not.
Uploading a main rewards image is a quick way to improve your project’s performance without incurring significant costs or spending a lot of time.
In this post, I’ll 1) examine the impact of the main Rewards image on your project’s payment conversion rate based on data,
2) share real-world application examples, and 3) explain which images work well versus those that are less effective.
What is a Rewards featured image?
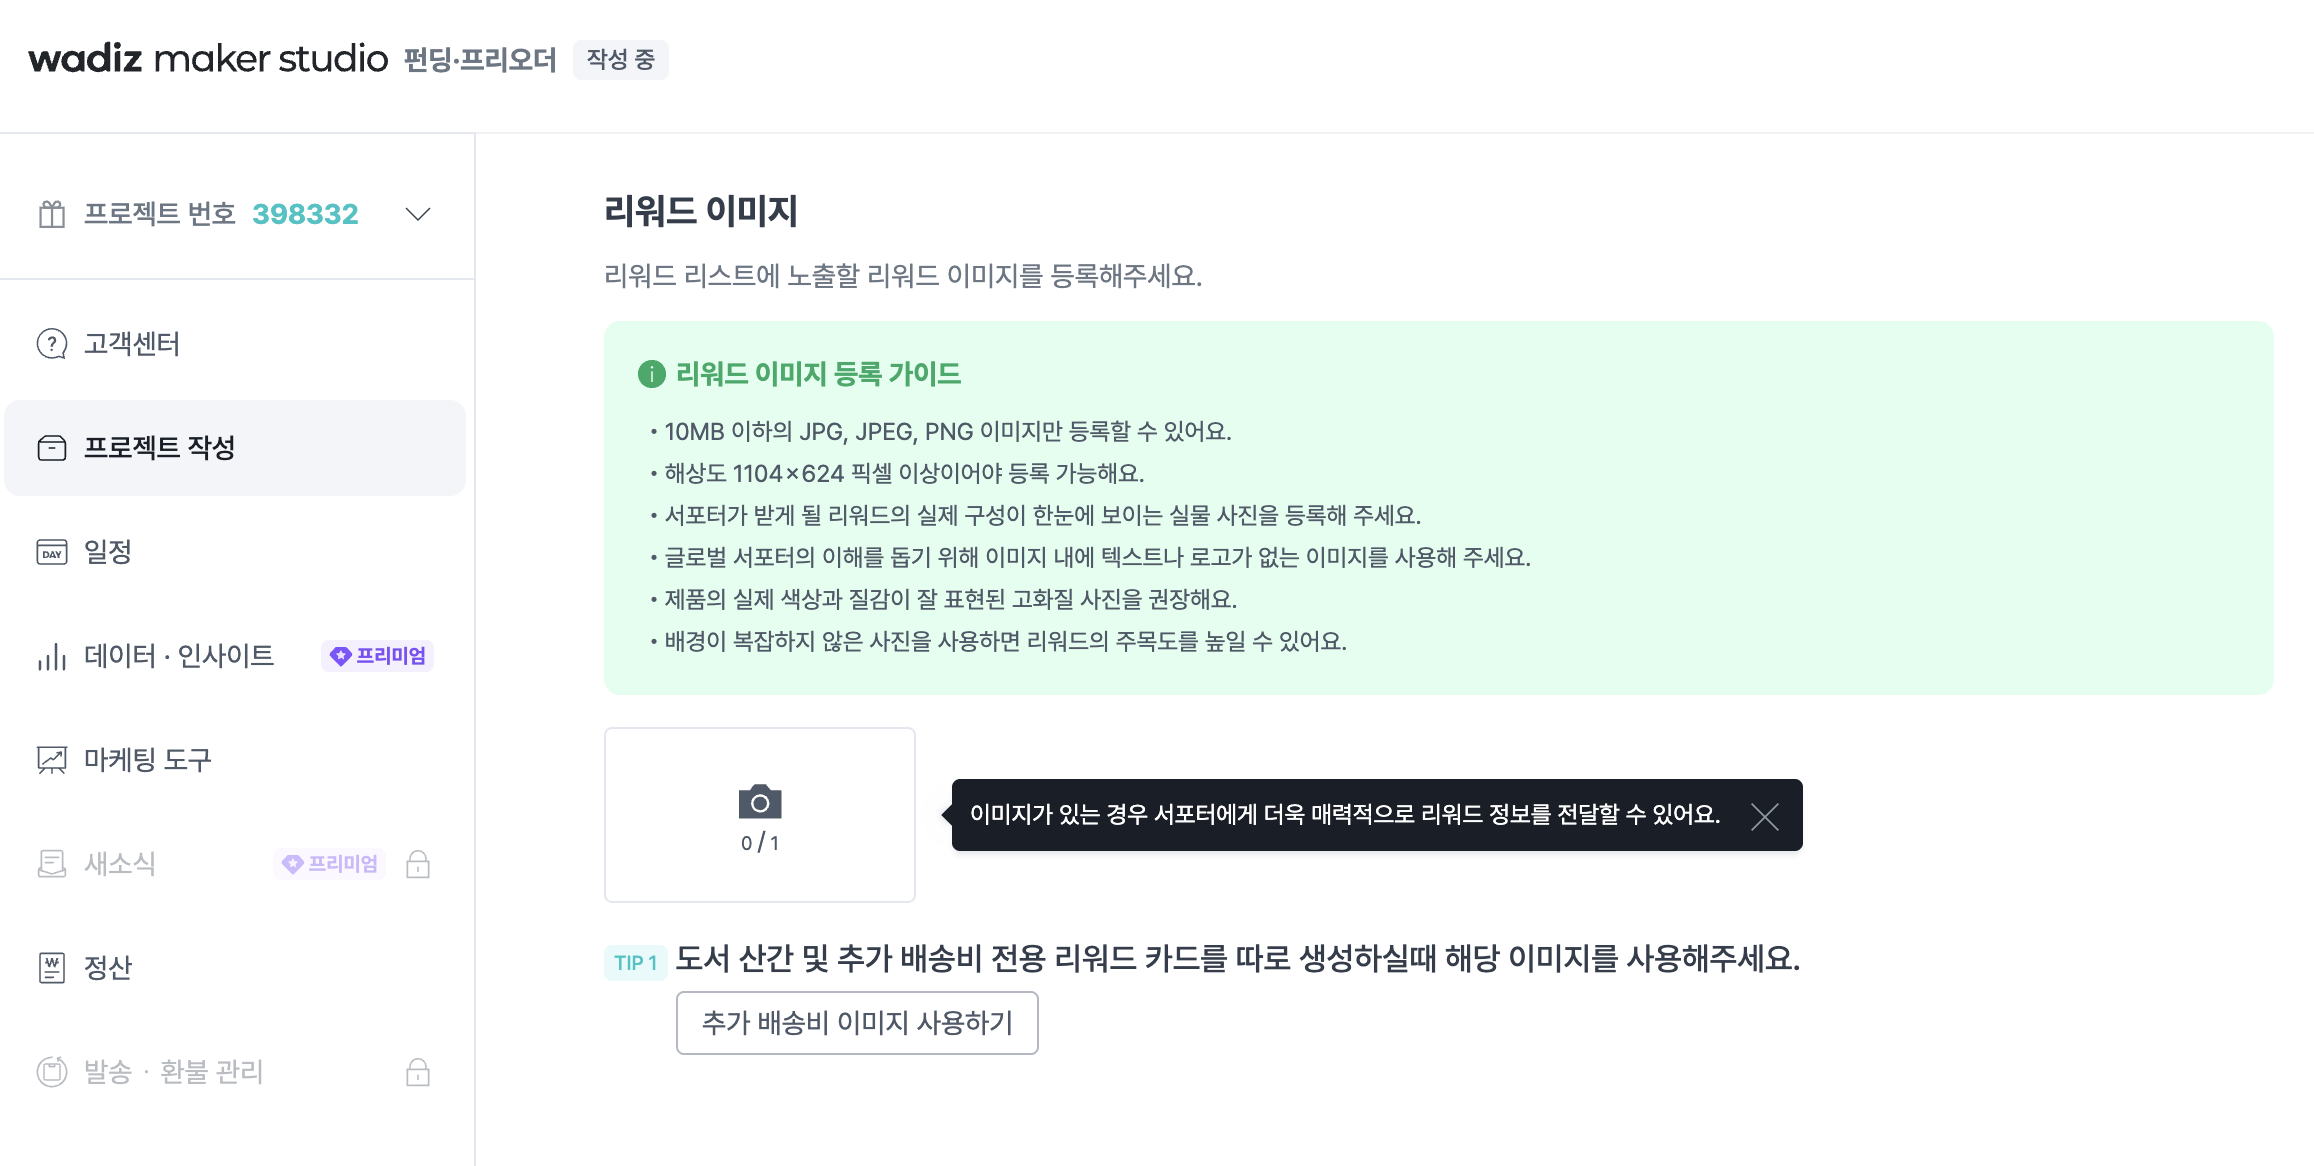
A Rewards main image is an image you can upload for each option on a maker studio project during the “Add Rewards” step.
These images appear alongside the Rewards options descriptions on the project page viewed by supporters, allowing them to quickly grasp the Rewards’ composition, color, and quantity at a glance.
The Effectiveness of Rewards Images, as Seen in the Data
We compared projects with and without main images among those running during the month of May for funding on wadiz, and the results were surprising!
- Projects with a featured image had a conversion rate was 1.7 times higher.
- The number of supporters selecting Rewardswas also 7.4 percentage pointshigher.
Projects with a Featured Image |
Projects Without a Featured Image |
|
Rewards Click-Through Rate |
30.9% |
23.6% |
Funding Conversion Rate |
8.2% |
4.6% |
This data clearly shows just how much of an impact a single main image can have on supporters’ decisions to back your project.
How can an image make such a big difference?
The moment a supporter sees a Rewards image, they can visualize what it would be like to actually receive those Rewards if they chose that option.
According to eye-tracking research by the Nielsen Norman Group,consumers process images faster than text, so
when Rewards options include images like this, users can categorize the choices based on the images alone before reading the text, which can significantly speed up their decision-making process.
Let’s take a look at an example of a project that included representative images for Rewards.
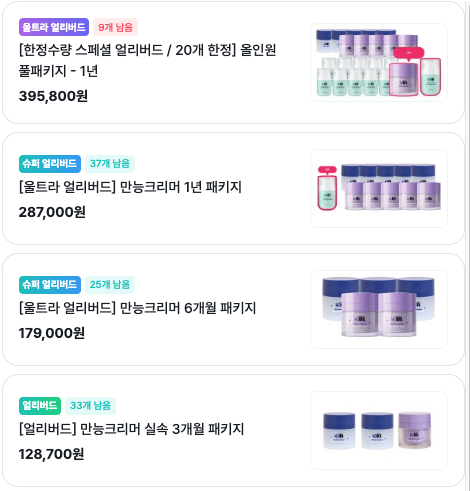
Kift All-Purpose Creamer |
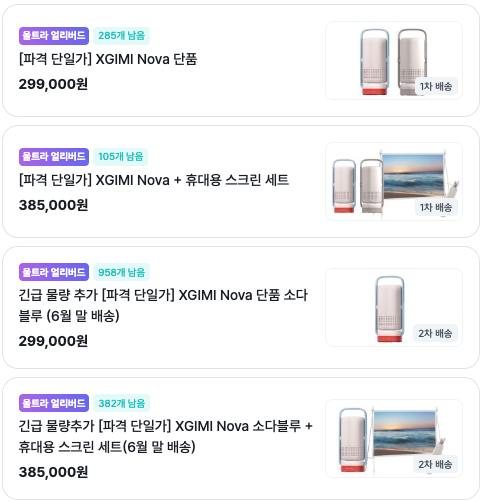
XGIMI Nova Speaker |
 |
 |
Kift’s “All-Purpose Creamer” project drove quick payment conversions by uploadingimagesfor each Rewards optionthat clearly showed the differences in package contents—such as 3-month, 6-month, and 1-year options— at a glance. Supporters can intuitively understand what they’ll receive just by looking at the image, without having to read the detailed description.
XGIMI also usedimages that intuitively conveyed the product’s colors and configurationsso that supporters could quickly grasp the Rewards and proceed to checkout.
+) Tips for Using Early Bird Options
If you plan to design early bird benefits when setting up your Rewards tiers?
Just like the options above, you can categorize early bird benefits into “Ultra Early Bird,” “Super Early Bird,” and “Early Bird” based on the size of the benefit and shipping order.
👉 Curious about how to set up early bird packages and options?
FAQ: How to Prepare Rewards Images
Q1. What kind of images should I upload?
Based on wadiz’s analysis, images that meet the following three conditions proved to be the most effective!
① Real-life photos showing the actual contents at a glance: Photos that accurately depict the exact contents supporters will receive inspire the most trust.
② High-resolution photos that clearly show the actual colors and textures: The product’s true appearance should be conveyed without excessive editing.
③ Photos with a simple background: A white or solid-color background makes the product stand out more.
To ensure your campaign stands out, please avoid these types of images!
① Images with text, logos, badges, or borders: These distract from the product and diminish the appeal of the Rewards.
② Composite or low-resolution images: Images that are pieced together or have distorted aspect ratios undermine credibility.
Q2. Can I include text within an image?
It’s best to keep the image clean and focused solely on the product! Elements like text, logos, and badges distract the viewer. Additionally, since the images displayed on the Rewards screen are small, including text can actually reduce readability.
Q3. What are the acceptable image sizes and formats?
File Formats |
JPG, JPEG, PNG |
File Size |
10 MB or less |
Resolution |
1,104 × 624 px or higher recommended |
Upload Location |
Maker Studio → Rewards → Image fields for each option |
Try it out right now!
Please remember that a single clean image contributes to the success of your project,
and if you’re currently preparing to launch your project, be sure to upload your main Rewards image!
Start with wadiz. Just Start on wadiz.
Updated: May 14, 2026